If you’re in a hurry, you can skip to the third chapter (“The proper method”).
As mentioned in a previous post, I wanted to find a solution using fdisk and gparted. I used the latest ones available for Ubuntu 10.04 by the beginning of August, but since we’ll be doing everything quite manually, older versions have a fair chance to work decently too. Note that I only wanted to create one big extended partitions with many logical ones inside. Also, when I’ll talk about a sector, I’ll refer to the virtual 512 bytes sectors.
First try
I had great hope after finding what seemed to be a great tutorial on Linuxconfig.org. Pretty short and crystal clear: to make it even shorter:
- change fdisk units to sectors (once fdisk is running, type “u”)
- start the extended partition at sector 64 (the default is 63), and end it at sector (total amount of sectors on the drive – 1)
- then make partitions with a size which is a multiple of 64 sectors, leaving a space of 64 sectors between them
So I made myself a little OpenOffice spreadsheet (first sheet) to help me calculate all this, and then applied to the drive with fdisk (we’ll see the syntax in the paragraph where the partition scheme actually works). I then formatted using gparted (don’t edit the partitions, just right-click the partitions and select Format to).
Checking and correcting
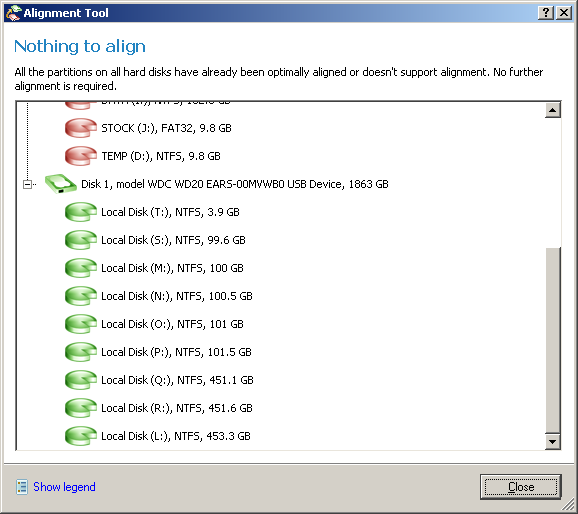
I used the Paragon version of WD Align, because I started using it when I used to have a few data on the drive. I guess you won’t have data at that point, so you should rather get the Acronis version, which is way much faster, not even for fixing but also for detection/testing (I used it too, later). Anyway, I ran the thing and only one partition was properly aligned… so I made the software fix them, then analyzed the correction. If you want to details (not really explained though, that’s just some of the raw calculations I tried), check out the second sheet on the previously-mentioned OpenOffice spreadsheet.
The proper method
Here are my conclusions from the correction performed by the WD Align tool:
- The extended partition should start at sector 64 (it could probably start elsewhere too, like maybe at 2048 or 4096, but 64 is just fine according to the WD Align software, so why waste more? ;)) and end at sector (total amount of sectors on the drive – 1).
- The first logical partition should start at sector 4096 (I don’t know where it should start if the extended partition started somewhere else than s64).
- Logical partitions should have a size, in 512B sectors, in the form of 2048*n, where n is an integer. Since this include both the first and last sectors, this means that the last sector will be [first sector]+(2048*n)-1 (I know, the parenthesis aren’t necessary, but just in case someone wouldn’t know, it does no harm either).
- Any logical partition should start 2049 sectors after the previous one ended. Or, more accurately: [first sector of partition 2]=[last sec of P1]+2049. Which means there’s a gap of 2048 sectors between 2 partitions.
A quite noticeable consequence of those rules is that partitions will start on an even sector, and (except maybe for the extended one) end on an odd sector. Another noticeable thing is that partitions size will be best determined in mebibytes (MiB), since 1 MiB = 2^20 Bytes = 2048 sectors. So on the third and final sheet of the spreadsheet, the partition size will be measured in MiB.
Creating and formatting the partitions
Now that you figured out the proper partition sizes, you can create them with fdisk. The quick syntax guide for this would be:
- su: login as root (“super user”)
- fdisk /dev/sda: launch fdisk for drive sda. If you’re on en external drive, this will probably be sdb or more. Make sure you’re working on the right drive before messing with it! A good check could be simply to list the existing partitions (see next step)
- p: displays the partition table (very important: this includes all pending operations on the drive – fdisk won’t write anything to the disk until you “write table to disk” – see later)
- u: toggles between cylinders and sectors as the display and entry unit. You’ll want to use it to switch to sectors before doing anything else, as sectors are all what this guide is about!
- n: create a new partition, it will then ask whether you want a primary (“p”), extended (“e”) or logical (“l”) partition, then ask for starting sector then ending sector.
- w: “write table to disk and exit”: this will execute all pending operations and close fdisk. If you don’t want to apply your changes, use “q” instead.
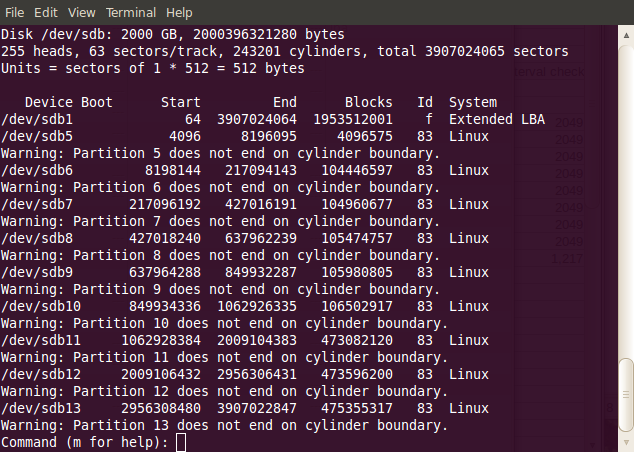
That’s pretty much all you should need. In case you need more, you can always list the commands by using “m” (menu). Finally, here are the commands I used to create the partitions on my WD20EARS (NB: that’s only the part when I delimit the partitions, I removed the preparation and final execution):
n

e

64

3907024064
n
l
4096
8196095
n
l
8198144
217094143
n
l
217096192
427016191
n
l
427018240
637962239
n
l
637964288
849932287
n
l
849934336
1062926335
n
l
1062928384
2009104383
n
l
2009106432
2956306431
n
l
2956308480
3907022847
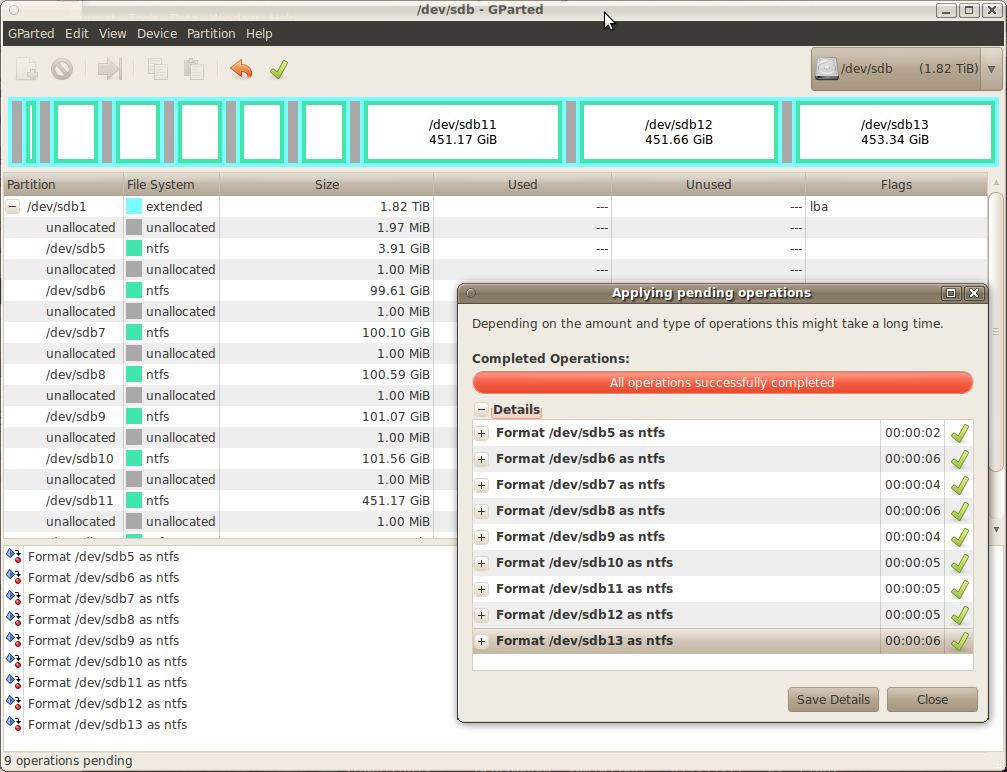
After you’ve created the partitions (and written the changes), you can simply format them using gparted, as mentioned at the end of chapter 1. The only weird thing is that gparted will display unallocated 1MiB blocks between every partitions. Just ignore those. That’s how it will look:

And here you are, with a properly aligned drive (you can switch back to Windows and run Acronis WD Align to be sure).


After such a long time without any Dr Who trailers, I couldn’t resist the temptation in such an appropriate setting ^^


There’s a basic error in how you use the math for partition sizes. The number of sectors in a partition is not just (end – start). Depending on how you look at it, it’s (end – start + 1), or (end – (start – 1)), or even ((end + 1) – start). Using a gross oversimplification for a clearer example, imagine a partition that starts on sector 1 and ends on sector 2. It has two partitions (the end number is inclusive). But (2 – 1) != 2. Probably the most proper way to think of it is that you’re measuring from the last sector within the partition to the last sector before the partition.
Anyway, this is why your spreadsheet comes up with all those crazy-looking (m*2^n)-1 kind of values.
Yeah I realized that shortly after posting it, but wasn’t sure how to make it clearer… so I left it this way since, well, basically the output of the spreadsheet gives values which are ready to use “as is” (sizes are wrong but start and ending sectors are ok), and this highly tedious method will hopefully become useless soon, when distros deal with those new hard drives properly…
Well, I’d have to agree with you there; after all, these big new drives I’ve got are why I’m here, reading this in such detail.
I think I managed to rephrase the paragraphs about partition size and spacing to be more accurate. I’m not touching the spreadsheet though, if it works don’t fix it ^^
Must the first logical partition within the extended partition begin at 4096? I’ve noticed that I cannot start at 64 (which would conflict with the Extended Boot Record). So can one then set the first sector of the first logical partition to 72 or would it be better to start at 128 or am I trying to hard to get a close shave on maximizing usable data?
I didn’t really manage to find any useful documentation on this. All I had in the end was the modifications made by the WD Align tool, which started that first logical partition at 4096. Maybe you could try 2048, it seems that aligning everything on 1MiB intervals is the recommended way to go… although I agree it’s quite a waste.
David,
Thank you for this excellent guide. I read so many different articles and web pages, but your article made the most sense of all. I do have a question though. Having followed your guide, I was able to get my Seagate Barracuda drive partitioned correctly, with no misalignment.
How though do you actually install Ubuntu or another distribution? I have tried both a Live DVD as well as the alternate installation DVD, and in both cases, the installers somehow cause the partitioning to change and reintroduces the misalignment again. I have been tearing my hair out, trying to get the new Seagate hard drive installed!!! I was wondering if you had any thoughts?
Many thanks in advance
Jeremy
Hi,
This seems quite strange: as far as I remember, when you install Ubuntu you have the option to just leave the partitions as they are. Just make sure you do select custom/manual partitioning, and then don’t move or resize any partition (just format a pre-defined one in ext3/4).
Still, I would expect that over 2 years after the introduction of this kind of drive, a current version of Ubuntu (or any other up-to-date distribution) would be able to deal with those drives nicely…
Sorry I can’t really help much more, I haven’t actually used such drives to install an OS on them in the end, since I eventually turned to SSDs.