A simple way to support Tor is to simply run a relay (or, for those who lack bandwidth, run a bridge). However, I’m not a big fan of running it just like this on my PC, so I prefer to isolate it in a virtual machine. That sounds safer, and it allows me to just keep the VM image whenever I change computer. And also, it will allow you to use the very same Linux distribution as I use, for the most similar setup steps possible 😉
The first step is to install a virtualization software. But while you do, you may want to start downloading Debian, or whichever distro you want to run in your VM. I suggest getting the 64 bits Debian network install (the *netinst.iso), as we won’t need many packages. If you can use it, the torrent download is usually a lot faster than the direct download.
Back to the virtualization software: VirtualBox will do nicely. Install it, and when you do, should you choose to mess with the installation settings, make sure you keep “VirtualBox Bridge Networking” selected.
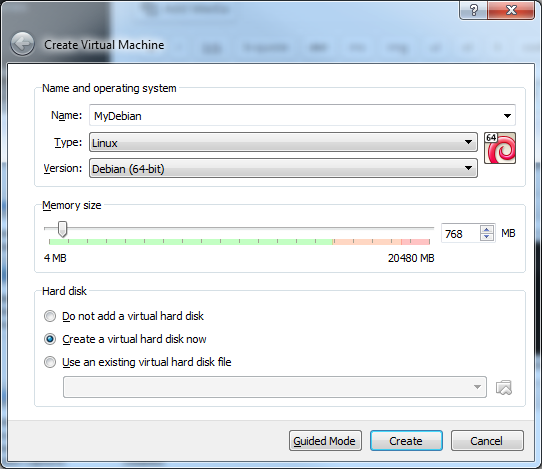
Then start create a new virtual machine: set the type to “Linux” and version to “Debian (64-bit)”.
You can leave the memory at 1024 MB. You could even try to set it lower (512 MB should actually be more than enough). This is because we will install only the bare minimum (and notably, no desktop environment). If you plan to install a desktop environment and other stuff (and basically, do more than just run the Tor relay on this), then you should consider adding a bit more RAM.
In the hard drive section, check “Create a virtual hard disk now”.
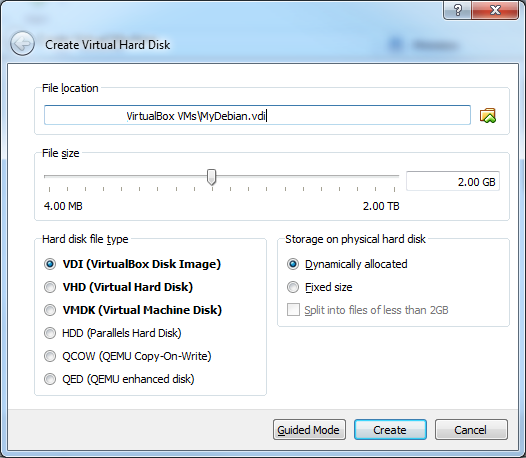
Choose a path to store your disk image. Set the size to around 2 GB (you could probably set it to a bit less, 1.5 GB should be enough if you stick to the minimal install, but it might cause space issues when upgrading), or a bit higher if you don’t mind wasting a bit to avoid potential limitations in the future.
For hard drive disk type, pick VDI (VirtualBox Disk Image), and choose dynamically allocated storage if you’re using an SSD (otherwise, on a HDD, choosing fixed size will avoid fragmentation). Hit “create” and voilà, you’re ready to install Debian.
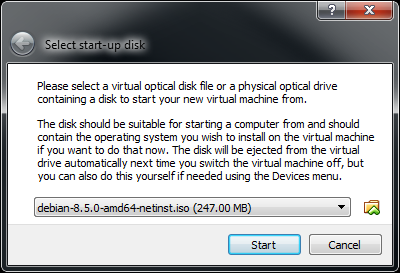
Start your brand new VM. A dialog will pop up, asking you to select a start-up disk: browse to the Debian ISO image you just downloaded and select it.
You’ll arrive to the “Debian GNU/Linux installer boot menu”. Select, as you prefer, either “Install” or “Graphical install”. I’ll pick graphical install for the sake of tutorial aesthetics, but non-graphic has the same options, only you don’t get a mouse pointer to make the navigation easier.
Pick your language, country, locale, keyboard layout, etc.
At some point, you’ll have to set up a root password and a user password: I would advise to keep them all lower-case letters at first, because I once had problem with numbers (so bad that I had to reinstall as I couldn’t log in…).
Then you’ll reach the partitioning screen. Select “Manual” (as guided would create a useless swap partition), and create a unique, primary, bootable partition. When you’re done it should look like this:
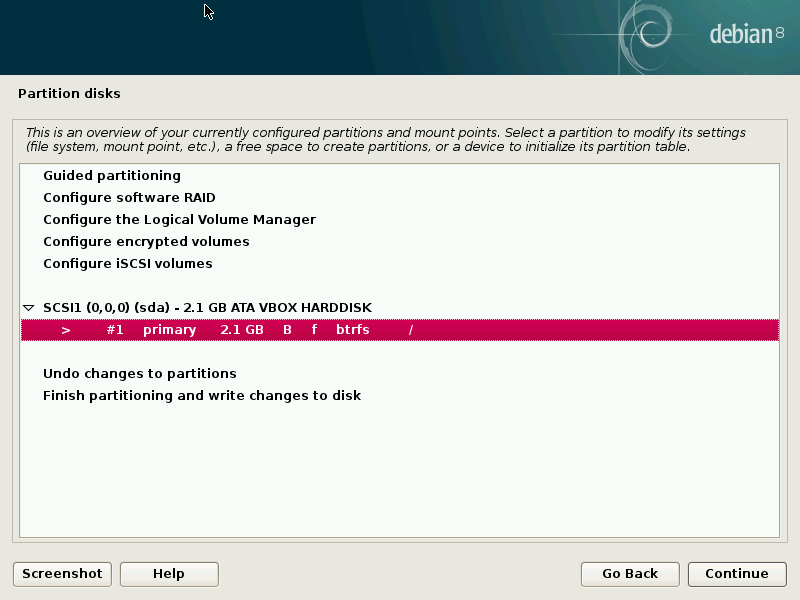
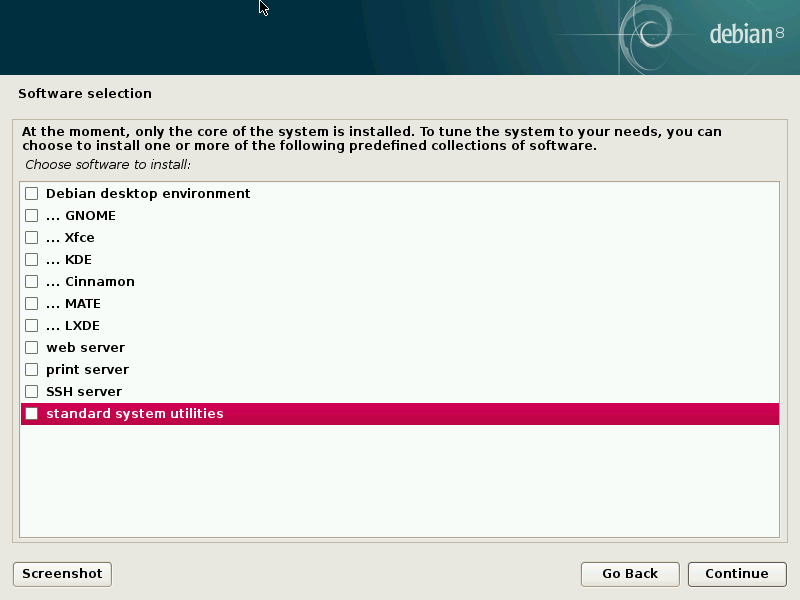
It will complain that it has no swap, just ignore it and confirm you want to write the changes. Then wait a couple of minutes for the base system to install. Pick a Debian archive mirror, configure your HTTP proxy (hopefully you have none and should leave that field empty – if you do use an HTTP proxy, I think you’ll need to search for proper ways to configure Tor), wait a bit for APT to set up, configure the popularity contest if you want, and finally you get to software selection. Unless you have specific needs or don’t want to do everything in the console (in which case you should install a desktop environment), uncheck everything.
Package installation should be fast as we selected the small possible set. Then install the GRUB boot loader to the master boot record (put it on /dev/sda), and voilà, installation complete. Click continue to reboot.
Rather than jumping straight into Tor installation, first shut down the machine. We need to configure some network stuff.
In VirtualBox main screen, go to the machine’s settings. Then to Network, and configure Adapter 1 so that it is attached to “Bridged Adapter”. I do this because I have a router, and most (if not all) ISPs where I live do provide a router. If you don’t have a router, then I think NAT would be more appropriate (and then I guess you’d need to configure port forwarding within VirtualBox itself). I found this page which explains the different network connection types quite well. It’s from the WMware documentation, but seems to translate directly to VirtualBox too.
Now you can launch the VM again. Log in, and after a few seconds you should be able to see your VM in your router’s interface. You can then use your router to assign a fixed local IP to the VM, and forward ports to it. You’ll need to forward at least 1 port for Tor relaying (same port as “ORPort” in Tor’s config), and a second one if you also enable the directory (same port as “DirPort” in Tor’s config).
For the Tor installation itself, I will refer you to my previous Tor installation guide here. It’s more than 4 years old already, but it still applies pretty much to the letter.
Note that the post focuses on creating a Tor relay, but it will only take a slightly different Tor configuration to create a bridge or an exit node.
If you have any questions, the comments are available as usual 😉

0 Responses
Stay in touch with the conversation, subscribe to the RSS feed for comments on this post.